Introduction
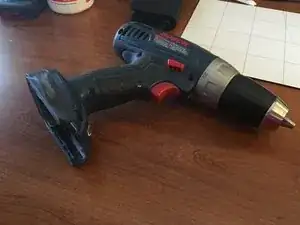
Overview of how to take apart a Bosch 36618 cordless drill driver. I will be taking apart the drill and cleaning bits and pieces as I go. I am not fixing or repairing any particular part of the drill. I hope you find this guide helpful!
-
-
Remove the battery before any disassembly.
-
Prepare a workspace by having a clean, level surface and any required tools within reach.
-
-
-
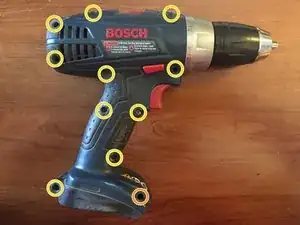
Remove the 11 T10 Torx screws from the exterior of the drill driver.
-
The screw circled in orange is recessed quite far and might not be reachable with certain T10 screwdrivers.
-
-
-
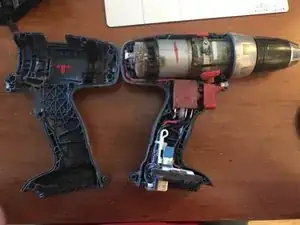
After the 11 exterior screws are removed, pull the plastic housing pieces apart.
-
There are no tabs or plastic flaps holding the two pieces together. Pull straight up and the two pieces should separate easily.
-
Check out all that dust by the motor, that can't be efficient!
-
The second picture is a closer up shot the side with all the electronic goodies.
-
-
-
The motor and chuck assembly can be pulled up and out.
-
Be aware of the speed selector (first picture) which is slotted onto the motor and chuck assembly as you remove it.
-
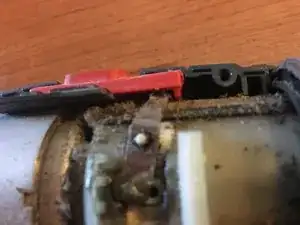
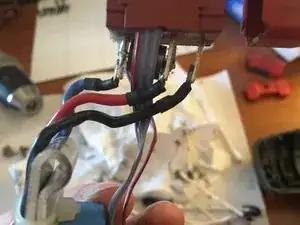
Remove the electrical connections. The colors are marked on the motor so no need to remember which side is which.
-
The electrical connections are spade terminals with a little locking piece on the front (non flat) side of the spade. Push the lock to the back and pull the connector straight out.
-
What's remaining is the motor and chuck assembly (third picture).
-
The chuck can be removed with a hex key, I didn't go that far in the disassembly.
-
-
-
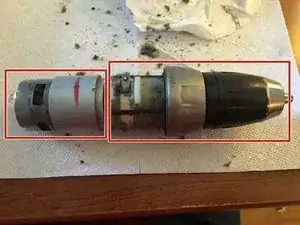
The motor can be removed from the chuck assembly with a clockwise twist.
-
The two red boxes in the first picture depict where the separation will occur.
-
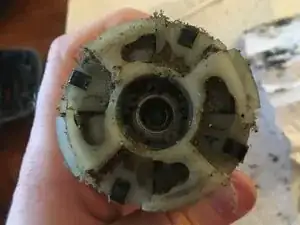
The second picture shows the connection on the chuck assembly side.
-
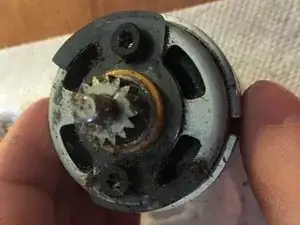
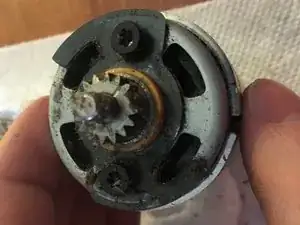
The third picture shows the connection on the motor side.
-
-
-
Remove the black plate on the motor by removing the two T15 Torx screws.
-
When reassembling, slotting the gear pictured to the left back into the chuck assembly can be finicky. Be patient and take your time.
-
-
-
Here are some closeups of a few electrical connections.
-
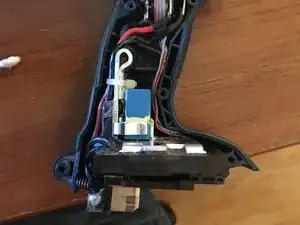
Picture 1: connections to the trigger assembly.
-
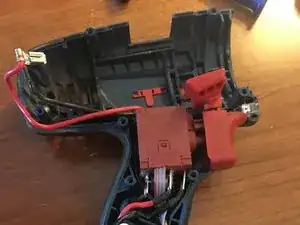
Picture 2: connections on the rear of the battery receptacle.
-
-
-
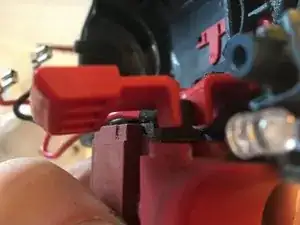
Picture 1: closeup of the forward, revers, and lockout assembly.
-
Picture 2: be cautious of this spring behind the battery receptacle, it likes to fall out.
-
-
-
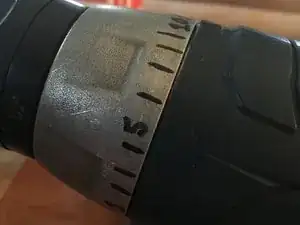
Here's the thoroughly cleaned and fully reassembled drill. No extra pieces, yay!
-
Picture 2. I relabeled the torque ring with Sharpie so that the markings were legible again.
-
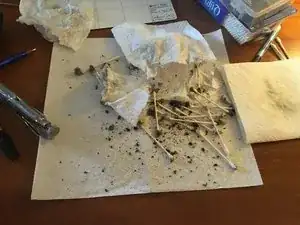
Look at all that dust and particulates that were gunking up the drill! I'm sure the drill driver will operate more smoother and efficiently now.
-
Thanks for looking at my teardown! Happy fixing!
-


5 comments
In order to replace the gearbox (part 2606200263) for new one, you must remove the chuck. I tried to but was not able. After removing the screw inside the chuck, I tried to unscrew the chuck counter clockwise without result. Do you have the trick?
Dionne -
Dionne,
I’m sorry I do not have any special tips or tricks, only what’s in the guide. Maybe if I would’ve seen your question four years ago I would’ve remembered more about taking this thing apart, good luck though!
Calvin -
Curious question: Why do all Bosch promotional pictures of drills always show only a right-side side-view? (see Google images)
Thanks Calvin for taking the time to post this. The pictures and notes were excellant. I have a question more than a comment. Does the Bosch 36618 have carbon brushes? And if so, where should I start looking for them. My old 36618 all of a sudden is hesitant to start and then has sparatic speed when the trigger is pressed.
@mmaterne Im pretty sure it has carbon brushes. I don’t remember explicitly since it was so long ago, but by looking at the po tires, since two wires go into the motor it’s gotta be a DC motor and I don’t know any other to use to wires with a DC motor other than brushes. And carbon is the main material type for brushes, so carbon brushes should be good for you.
Carbon brushes can be bought at a local hardware store like Ace or DoIt Best or TruValue or Menards or Home Depot, or here’s an Amazon link: Carbon Brushes Compatible for Makita Cb154, Motor Carbon Brush Set Replaces Makita 194986 Power Tools (2 Packs) https://www.amazon.com/dp/B07Q6D1SDJ/ref...
This Amazon link is just an example, these ARE NOT THE EXACT BRISHES NEEDED FOR THE DRILL.
Calvin -