
Introduction
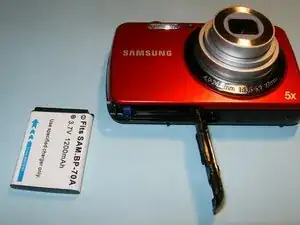
Here is a PL20 that has a broken LCD, as well as some other issues. The repair is straight forward. The only tools used were a Phillips screwdriver and a plastic opening tool, which is optional. This camera was actually fun to work on; it was easy and took no time at all.
Parts
-
-
Here is the broken LCD. The spider crack in the glass, as well as the discoloration of the screen, is clearly visible.
-
Remove the battery and the memory card from the device, if so equipped.
-
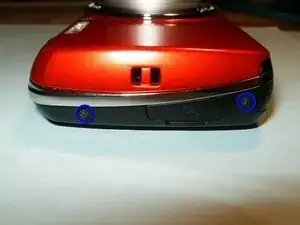
Remove the two screws on the left side.
-
-
-
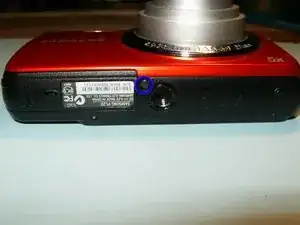
Remove one screw from the bottom
-
Remove the two screws on the right side.
-
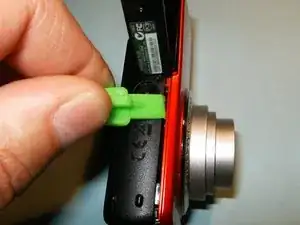
Use a plastic opening tool, or your fingernails, to split the casing apart. Start from the battery compartment and work your way around the case. The case should split easily.
-
-
-
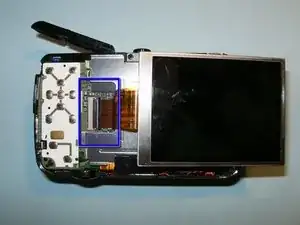
Once the back of the case is removed, the LCD becomes immediately visible.
-
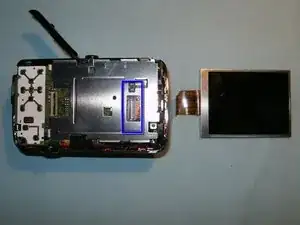
Remove the LCD from its holder to gain access to the connector.
-
Open the connector, and flip the black clip upwards, freeing the LCD. It can now be removed and the new one installed.
-


To reassemble your device, follow these instructions in reverse order.

One comment
Great help! Screen replaced no problem. Thank you
EE61 -