Introduction
This will result in extending the life of a product known to succumb to the elements, often needing replacement when not either protected or maintained. Wood is highly vulnerable to the elements, and instead of replacing a wood railing that is in decent condition, (something to be more of an eye sore) it can be nailed back into place if falling, sanded down to a healthier layer of wood, and stained/painted to protect it from weather for years to come.
Tools
-
-
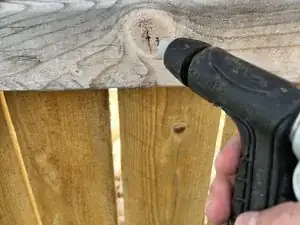
First, you will want to prep the wood railing and surrounding area.
-
You can use a hose to rinse, followed by a cloth if needed. Let the wood dry before proceeding to next step.
-
-
-
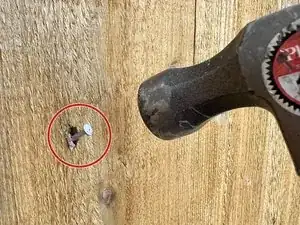
Next, you will want to secure the wood railing and its structure.
-
Hammer any nails that are loose.
-
-
-
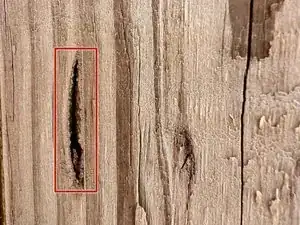
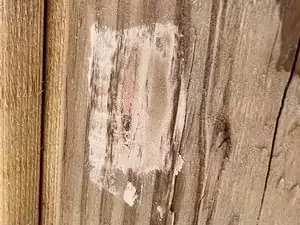
Fill in holes for both nails and wood imprfections/damage.
-
You can fill holes with an exterior wood filler. Simply just use your finger or a putty knife. Fill space completely. It is okay to have excess, as you will sand it in the next step.
-
-
-
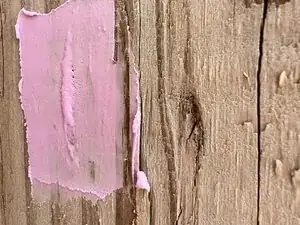
Sand the wood and the areas where you used wood filler.
-
Take your sanding paper or sanding block as shown, and sand the wood in a circular motion.
-
-
-
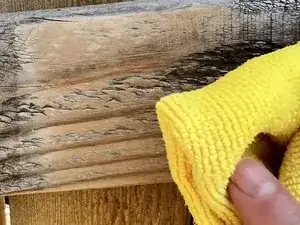
Once sanded, you will want to clean the entire wood railing with a damp cloth, or hose and cloth again if needed.
-
-
-
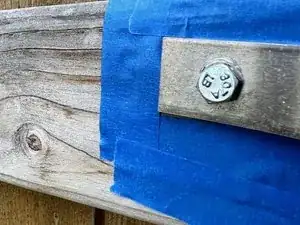
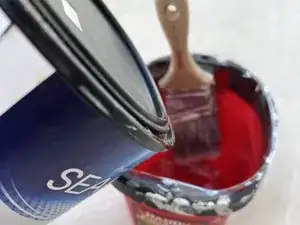
Lastly, it is time to paint or stain your railing.
-
You will want to pour your paint or stain into a paint pail. This will make it easier and more efficient when using a paint brush.
-
Take your brush and do short-to-medium strokes in the direction of the wood grain. This will provide a smooth application. Your paint strokes should go from left to right, or right to left.
-
Once all of the wood railing has either been painted or stained, you are done! Let dry for a couple of hours before touching.
-


In conclusion, your wood railing is now protected from the elements, AND, looks amazing! For cleaning you can wipe with a damp cloth, or water hose. You can touch up the wood railing with the paint or stain if needed.
