Introduction
This guide instructs you in the removal of the side panel of your Canon Optura 100MC. This disassembly is a prerequisite to many other internal repairs, such as buttons and speaker.
Tools
-
-
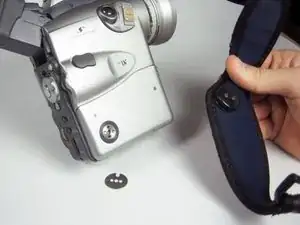
Orient the camera so that the back button panel and viewfinder are facing you.
-
Push the "Battery Release" button to the side and hold.
-
-
-
While holding the battery release button to the side, slide the battery towards you, past the release button.
-
-
-
Orient the camera so that the viewfinder is on your left and the lens is on your right.
-
Remove the 4mm #00 Phillips screw.
-
-
-
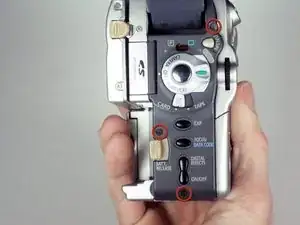
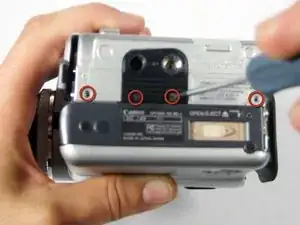
Reorient the camera with the back button pad and viewfinder towards you.
-
Remove the three 4mm #00 Phillips screws shown on the rear face of camcorder.
-
-
-
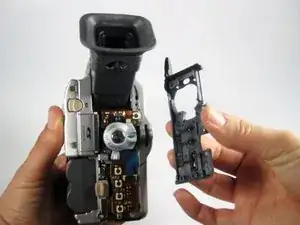
Remove the plastic cover from the rear of the camcorder by gently pulling it towards you while holding the camera as shown.
-
-
-
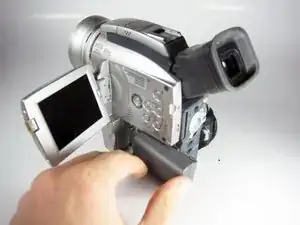
Open the LCD by using the release switch.
-
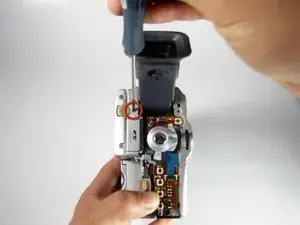
Reorient the camera with the playback button pad and edge of LCD screen facing you.
-
Remove the 4mm #00 Phillips screw shown.
-
-
-
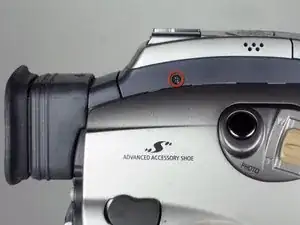
Reorient the camera with the top facing you. The side with the LCD screen should be on the right and the other side panel should be on the right.
-
Open the pop up flash on the top of the camcorder.
-
Remove the 4mm #00 Phillips screw shown.
-
-
-
Reorient the camera with the bottom facing you, LCD screen on the right, side panel on the left.
-
Open the tape deck by sliding the switch and moving the deck cover to the left as shown.
-
-
-
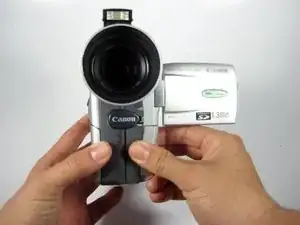
Reorient camera with lens facing you.
-
Remove the #00 Philips 4mm screw shown on the hinge of the tape deck cover.
-
-
-
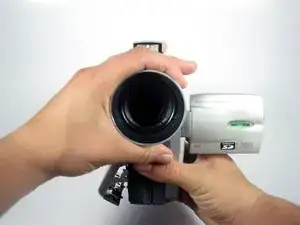
To remove the camcorder lens hood, twist the hood to counterclockwise and it will come loose, then pull towards you.
-
-
-
Close the tape deck by gently pushing it toward the body of the camera.
-
Slide and remove the plastic cover on the bottom right, exposing the interface shown.
-
-
-
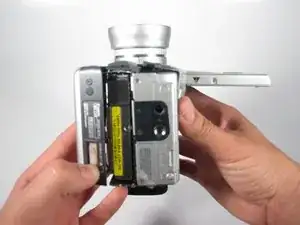
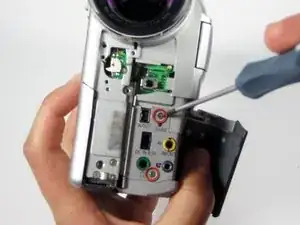
Reorient the camera so you are looking at the side of the camera with the viewfinder on the left and lens on the right.
-
Holding the camera as shown,remove the 4mm #00 Phillips screw.
-
-
-
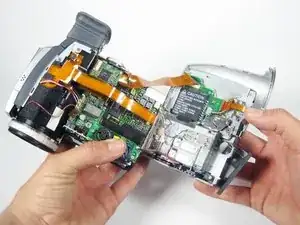
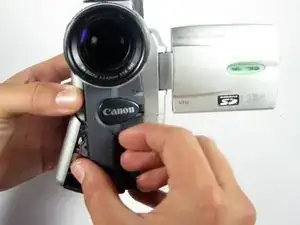
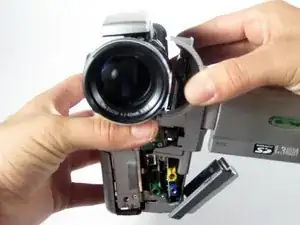
Reorient the camera with the lens facing you.
-
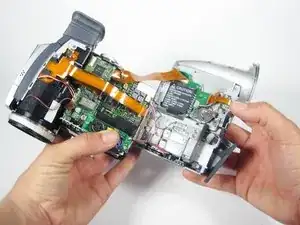
Gently pull the side panel of the camera to the right to remove.
-


To reassemble your device, follow these instructions in reverse order.