Introduction
Additional Information
Tools
-
-
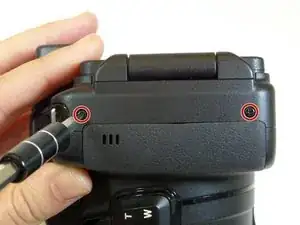
Use a Phillips screwdriver and remove the eleven 5.556 mm screws around the outside frame of the camera.
-
-
-
Open the "HDMI" rubber flap.
-
Use a Phillips screwdriver and remove the 5.556 mm screw underneath the flap.
-
-
-
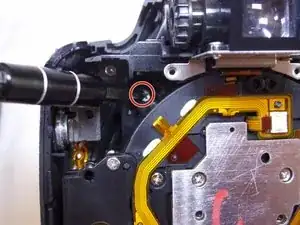
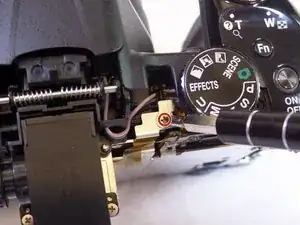
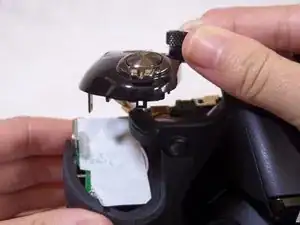
Use a Phillips screwdriver and remove the single 6.350 mm screw, left of the mode-adjustment dial.
-
-
-
Use needle-nose tweezers to remove the large ribbon-wire located under the screw.
-
Gently wiggle the ribbon out in an upward motion.
-
-
-
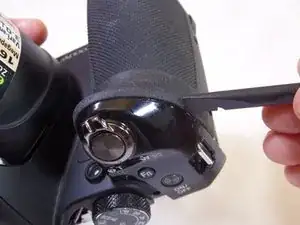
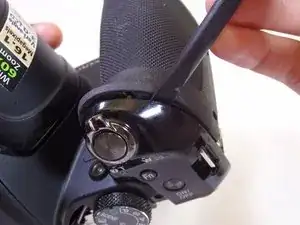
Insert a plastic opening tool under the shutter button.
-
Gently pry (back and forth) between the rubber grip and camera casing.
-
-
-
Place hands around the camera. Hold onto the mode dial and grip under the shutter button.
-
Gently push right thumb away and pull in left index finger to separate the camera halves.
-
-
-
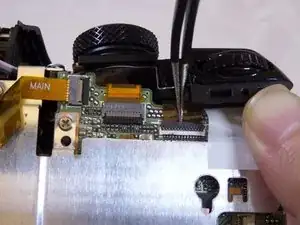
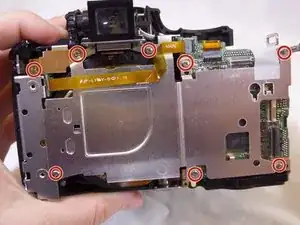
Use a Phillips screwdriver to remove the nine 3.175 mm screws on the inside of the camera.
-
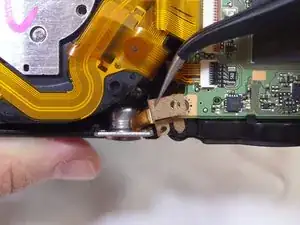
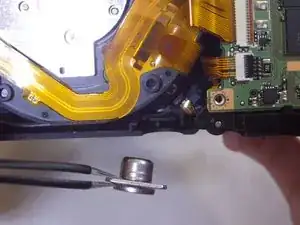
Use tweezers to remove the golden bracket.
-
-
-
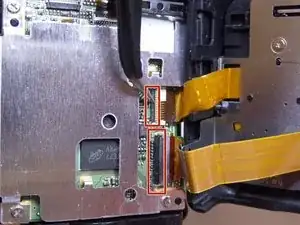
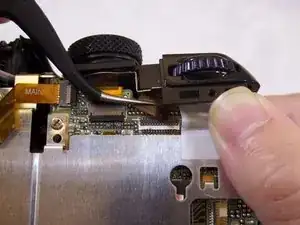
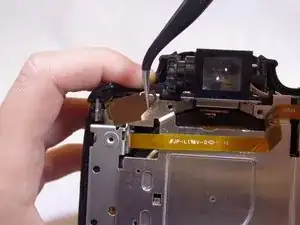
Use tweezers to remove the yellow ribbon-wire.
-
Gently wiggle it to the left and then out of its port.
-
-
-
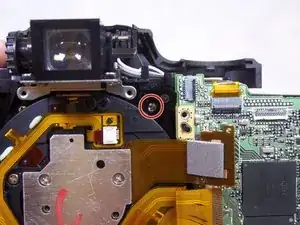
Continue removing screws, keeping an awareness of the cavity right below the screw. It would be difficult to extract screw if lost in this cavity.
-
-
-
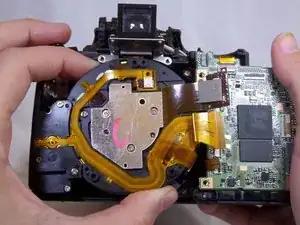
Remove lens by pulling up vertically.
-
Be careful not to damage any of the electrical ribbon on top of the lens.
-


To reassemble your device, follow these instructions in reverse order.
3 comments
Thank you this really helped me out
Hi,
I have the same camera with a swollen battery inside, i was able to remove it following your instructions but a little black piece popped out out of nowhere, I wonder if you have the same instructions for removing a battery when it is stocked. Thanks
Bethy -
where did you find the replacement lens for coolpix p610?