Introduction

How to replace a scratched, cracked, or unresponsive trackpad on a Dell XPS 15 9560 laptop.

Before using this guide, be sure to check that there is nothing else that could be causing or contributing to issues with the trackpad. One possible issue could be with your trackpad drivers. Here is a video by MDTechVideos that explains how to fix this issue. Another possible issue is that your trackpad has dust or debris on it. Fix this by spraying isopropyl alcohol on a microfiber cloth, then apply medium pressure the the surface of the trackpad and wipe the cloth in small circles on and around the trackpad.

  1. jUKaXAtFqXsZ1xJL
    • Using a T5 Torx screwdriver, remove ten 4.0 mm screws from the back panel of the laptop.

  2. OWsK3uFQ2DGW6vdZ
    • Using a Phillips #2 screwdriver, remove two 5.0 mm screws underneath the XPS badge door.

    I used PH0 screwdriver

    Gerald Dennett -

  3. Kt2Tg1sk3VDMyqZS
    • Wedge the scribe between the backplate and remove the bottom base cover.

  4. BMDNuJGST1pYSydH
    • Using a T5 Torx screwdriver, remove the six 4.0 mm screws.

    On the Dell XPS 15 9560 that I just did a battery replacement on the battery was not held in by torx screws. It was the larger 97wh battery and was held in by 6 phillips head screws. I was able to get them out with a PH1 bit.

    Nick Hamblen -

    Seconded. In the photo the author isn't even holding a torx driver.

    Gregory Robben -

    Same, by me it was held by 8 philips screws labeled M2X4.

    Sven Oelker -

    Mine is the smaller battery, held in by four PH0 screws. The two towards the middle of the computer in the photo above are not present.

    Gerald Dennett -

  5. EIPhbwKanoubPUAV
    • Unplug the battery cable.

  6. 42vITSAgbhUs33vj
    • Remove the battery.

  7. 4XGwZrNCdcDsdWQt
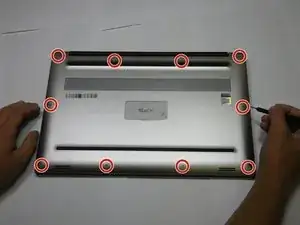
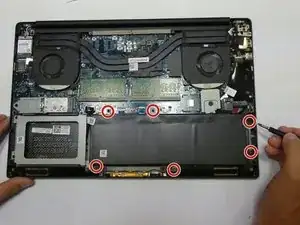
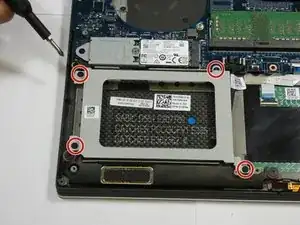
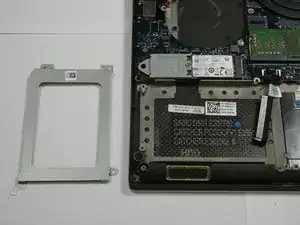
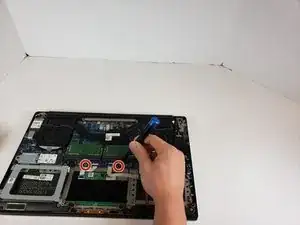
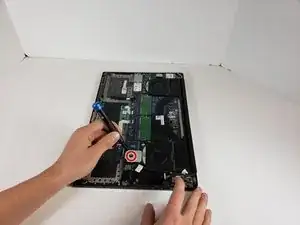
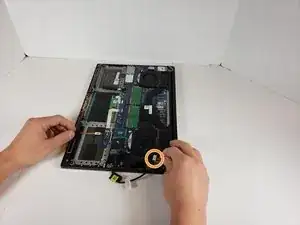
    • Using a Phillips #0 screwdriver, remove four 4.0 mm screws of the hard drive bracket.

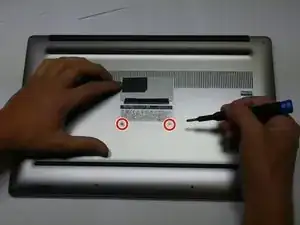
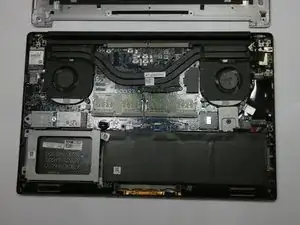
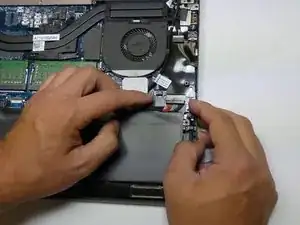
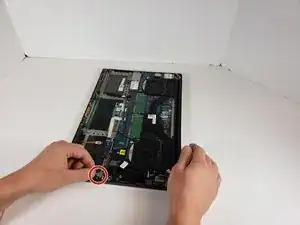
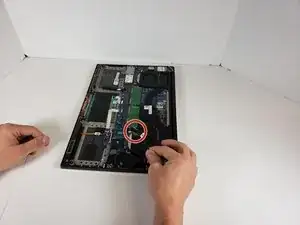
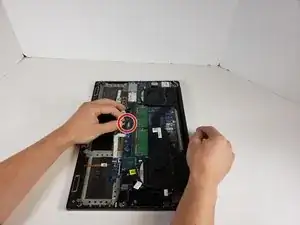
    • Unplug the hard drive cable.

  8. FlsGFdpXFwfoekMv
    • Remove the hard drive bracket. Then, unplug and remove the hard drive.

  9. scafbdwgXjAeNCW2
    • Shutdown & unplug your laptop.

  10. OlS2Wl2YOQO1QlV5
    • Remove the two 5 mm mounting screws.

  11. sBT1rrLLIQEWYLXU
    • To remove the plate, extract the 5 mm screw.

  12. joiZ1oWFguAmCqfw
    • Unplug the smallest cord by lifting the latch and pulling it straight out.

  13. T2TJMIeHNcpYKHYg
    T2TJMIeHNcpYKHYg
    UiUCCrZIYWNCPwtK
    • Unplug the black cord.

    • Unplug the cord with a white plug.

  14. YYJIeYMeGbpkinFA
    YYJIeYMeGbpkinFA
    MIRCyIVYhXZ1jS2x
    • Gently pull the white ribbon cables from their housings.

  15. 6wyCMDoBvJLZgOOn
    • Lift the laptop as shown.

    • Separate the touchpad from the keyboard.

Conclusion

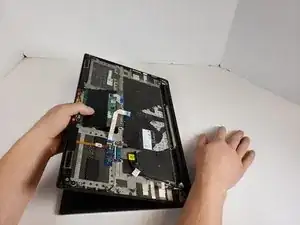
To reassemble your device, follow these instructions in reverse order.

Taylor Hancock

Member since: 18/01/22

133 Reputation

0 comments