Introduction
This guide is a prerequisite for the guide: [invalid guide link]. It is not intended to be used as a standalone guide as it is used when integrating steps where I need standardized instructions.
-
-
Sony: Sony a5X000 (SW driven) Sony Alpha (Advanced, a6X00 and up) Sony NEX (FOR NEX-5N; NOT CHECKED)
-
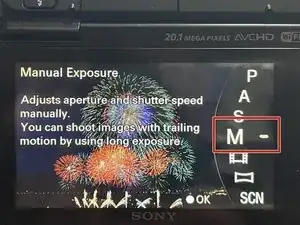
Switch the camera into a Manual mode (P/A/S/M; doesn't matter). You MUST be in a "manual" mode to use custom WB settings.
-
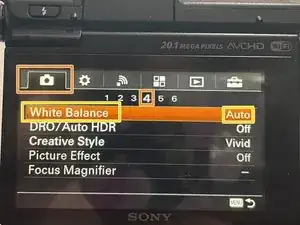
Open the menu and select the following: Camera settings>White Balance.
-
NOTE: The location of the white balance setting varies from camera to camera. Keep this in mind if you do not see the setting as shown in my demo a6000. (Ex: a6000 is Line 4, a6100 is under Line 9 and a6300 is under Line 5.
-
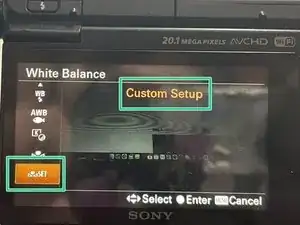
Select the White Balance option, and scroll down until you see Custom Setup. Take a picture of your lighting setup and press the Enter button to save it to the camera.
-
-
-
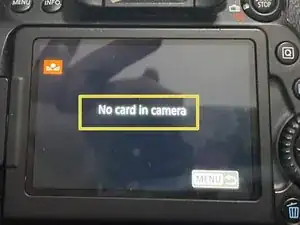
Take a picture of your workspace without any objects; it must be empty and have no outside elements to affect the WB. Full auto can be used.
-
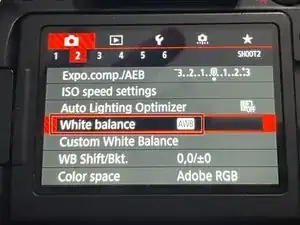
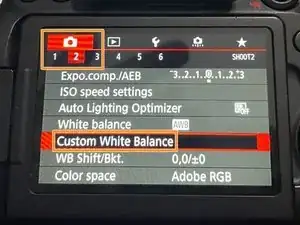
Put the camera in one of the 4 manual modes (P/A/S/M). Select the red menu (Menu 2), then select Custom white balance.
-
Select the white reference photo. Press SET on the camera. Once this is done, the camera will save the custom white balance.
-
To reassemble your device, follow these instructions in reverse order.