Introduction
This step-by-step guide demonstrates how to repair a driver-side front pillar trim of a Ford Explorer 2013 XLT though you can use it for your fifth-generation Ford Explorer, years 2011-2019.
When the front pillar trim is cracked, deteriorated, broken, or installed incorrectly it can pose a safety risk as it supports the front windshield. This guide is useful in repairing the front pillar trim of a Ford Explorer 2013 XLT.
Tools
-
-
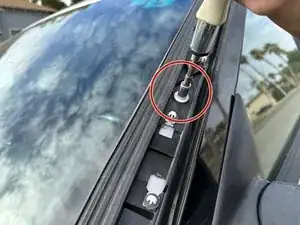
Use a ratchet socket and an 8 mm socket attachment to remove the six bolts from the interior pillar trim.
-
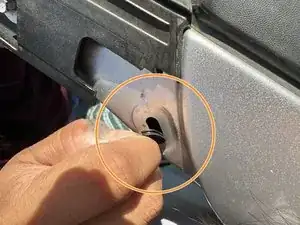
If there is a small tab attached at the upper corner, detach it by gently lifting and separating it from the trim.
-
-
-
Remove the damaged interior pillar trim and clean surrounding areas.
-
Use a rag and glass cleaner to clean the pillar trim area.
-
Remove any remaining residue from the window and metal. Use as much window cleaner as necessary.
-
-
-
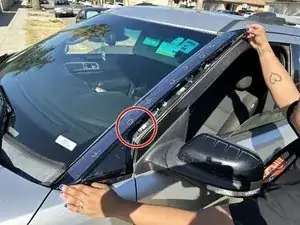
Align the new interior pillar trim part precisely with the corresponding holes on the vehicle.
-
Ensure they are aligned precisely and apply pressure.
-
-
-
While maintaining downward pressure on the interior pillar trim, secure the six bolts into place.
-
-
-
Align the small white head connections with the yellow points on the exterior trim, and then firmly snap the push tabs into place to secure the trim.
-


To reassemble your device, follow these instructions in reverse order.